snack

Red Currant Muffins (GF, DF)

So the number one question I'm probably going to get is WTF are currants? Honestly, I didn't even know myself until about 2 days ago. I stumbled upon some red currants at a small, local market when I was looking for blueberries and was intrigued. Obviously I googled them, and one of the first things that popped up was, "If you find local currants, buy them!" So I followed suit, snagged my currants, and headed home. Side note - they were gone in 2 days. 

From what I read, they seemed like tart berries, so I played around with them in the kitchen for breakfast. I loved the breakfast; My niece did not. Needless to say, they're definitely tart. So I figured the perfect way to balance out the tartness would be to put them into some delicious, sweet muffins. They did not disappoint! I made them gluten free and dairy free, and they are still so perfect and moist (sorry for the use of the word, but they are). Plus the sweet and tart balance is on point. And if you aren't feeling the idea of tart currants or just can't find them, feel free to swap them out for the berries of your choice. I'd imagine blueberries would be a great sub.

Here's What You'll Need:

-1 cup quinoa flour (I use this one)
-1/4 cup coconut sugar
-2 tbsp pure maple syrup
-Pinch of sea salt
-1 tsp baking powder
-1/4 cup unsweetened almond milk
-1/2 tsp vanilla
-1 egg
-3 tbsp coconut oil, melted
-3/4 cup red currants

Makes 6 muffins

Instructions:

1) Preheat your oven to 350 degrees.
2) Mix together all ingredients minus the currants until smooth.
3) Fold in the currants (may reserve a few to place on the tops of the muffins).
4) Evenly disperse the mix in a 6-cup muffin tin. Optional - top each with reserved currants.
5) Place the muffin tin into the preheated oven and bake for 20-25 minutes until muffins are fully cooked through.
6) Remove the muffins, serve, and enjoy!

These muffins make for the perfect snack, treat, on the go breakfast, or even dessert! I haven't tried subbing other flours or milks, but I will update this post if I do. Or feel free to let me know how it goes in the comments below! I would also imagine the ghee would work as a sub for coconut oil as well as a vegan egg for the egg, but again, I haven't tested it out yet. Let me know what you think in the comments below!

Protein Chocolate Covered Strawberries

IMG_4138.PNG

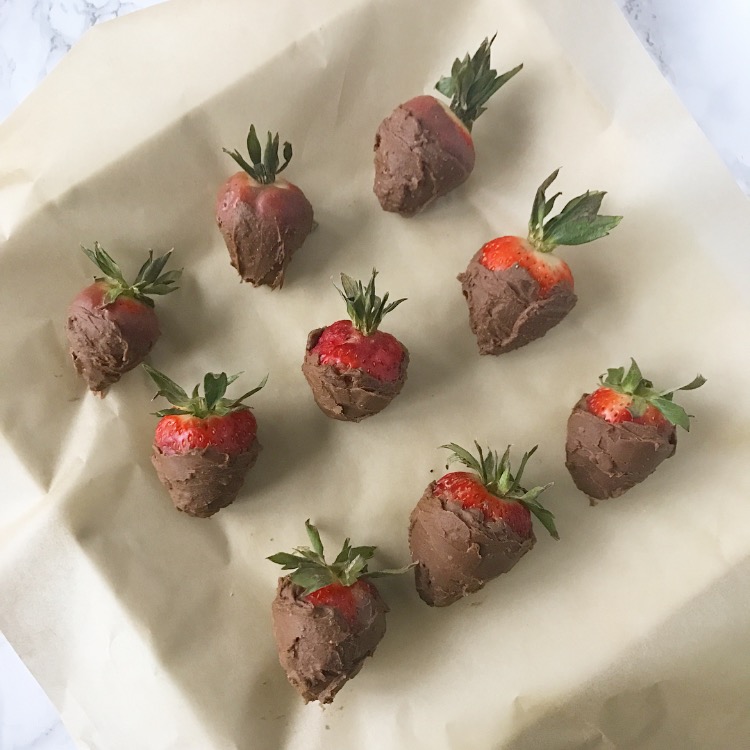
Happy Friday, everyone! What better way to celebrate than with CHOCOLATE! Not just chocolate but healthy, protein-packed chocolate covered strawberries? Does it get much better than that?!

These babies have just a few, natural ingredients. I'm talking cacao, natural sweeteners, coconut oil, and the best vegan protein powder around! They make for the perfect guilt-free dessert or snack while still bringing the flavor, and they're super quick and easy to whip up. Grab a couple before or after the gym, as a post-dinner dessert, or even to top off your morning oats. They're great any time! 

Here's What You'll Need:

-8 oz fresh strawberries
-1/4 cup coconut oil, softened to room temperature or slightly melted
-1 1/3 tbsp (that's 1 tbsp + 1 tsp) Naked Nutrition Less Naked Chocolate Pea Protein Powder
-1 1/3 tbsp (that's 1 tbsp + 1 tsp) Cacao powder (I used this one)
-1 tsp pure maple syrup
-1/2 tsp vanilla
-Pinch of sea salt

Instructions:

1) In a bowl, mix together the coconut oil, Naked Nutrition protein powder, cacao powder, maple syrup, vanilla and sea salt until smooth.
2) Dip each strawberry into the chocolate mixture and place on a parchment lined plate. You may want to use a spoon or knife to spread the chocolate.
3) Put the plate of strawberries in the fridge for at least 30 minutes until the chocolate hardens.
4) Enjoy!

It's that simple, and you have yourself a delicious treat to last the weekend! Yes, they'll go that fast. Let me know what you think in the comment's below!

Chocolate Almond Butter Banana Protein Cookies (Vegan + GF)

Chocolate almond butter banana protein cookies - what a freakin mouthful, am I right? But each ingredient is so important and adds such an extra punch of flavor to this recipe that I couldn't leave one out. So chocolate almond butter banana protein cookies it is!

They're vegan. They're gluten free. They take only 8 (YES 8) minutes to bake. They're delicious. AND you can even eat the batter because did I mention they're vegan and delicious? Plus you get some great protein thanks to Naked Nutrition's Chocolate Less Naked Pea Protein Powder and almond butter. So let's not waste anymore time and get this thing started!

Here's What You'll Need:

-2 scoops Naked Nutrition's Chocolate Less Naked Pea Protein Powder
-1 tbsp cacao powder (I use this one)
-2 tbsp coconut flour
-1 banana
-1/2 tsp baking powder
-1/2 tsp vanilla
-2 tbsp unsweetened almond milk
-2 tbsp unsweetened almond butter (I use this one)
-1 tbsp maple syrup
-2 tbsp sweet almond coconut butter (optional; I use this one)

Makes about 8 cookies

Instructions:

1) Preheat your oven to 350 degrees.
2) Mash the banana in a bowl until relatively smooth.
3) Add in all of the other ingredients minus the almond coconut butter and mix thoroughly until it forms a dough-like consistency.
4) Form the dough into balls about an inch in diameter and place on a baking sheet lined with parchment paper.
5) Flatten the balls slightly using your hand or the back of a spoon to form a cookie shape.
6) Bake in the oven for about 8 minutes, and then remove to cool.
7) (Optional) Warm up the almond coconut butter until it becomes semi-liquid and drizzle-able. Drizzle some on top of each cookie.
8) Allow the cookies to cool (and the almond coconut butter to harden).
9) Serve, and enjoy!

If you just can't wait, I do have to say that they're also great warm! Either way, they're a great pre or post-workout treat or just a great protein-packed snack or dessert. Also make sure to check out Naked Nutrition's other vegan protein products, and let me know what you think of the recipe in the comments below!

Green Chile & Aged Cheddar Turkey Meatball Skewers

Blue Moose of Boulder products have easily become some of my favorites. They make so many delicious goodies - hummus, cheese dips, salsas, and pesto, and they really are all SO good! As we're getting further into football season, it really hit me - they have the BEST game days eats! Veggies or chips with any of their dips or some pesto skewers would make for a huge hit during any entertaining you're doing this football season.

That being said, I decided I wanted to kick it up another notch and create even more options with these already delicious products. So over the next few weeks I'll be playing around with some fun football-ready recipes that are perfect to serve when you're watching the big game.

I decided to kick it off with some turkey meatballs. I thought the Green Chile & Aged Cheddar Cheese Spread would be the perfect way to pack that extra flavor into some mini meatballs. The idea was to make little appetizer-sized cheeseburger bites. I added some fresh burger toppings to the skewers, and they made for the perfect football snack!  

Here's What You'll Need:

-1 lb ground turkey
-1 egg
-1/2 cup whole wheat bread crumbs
-1/2 tsp sea salt
-1/4 tsp black pepper
-2 cloves garlic, pressed or minced
-3 tbsp Blue Moose of Boulder Green Chile & Aged Cheddar Cheese Spread
-2 large tomatoes, chopped
-About 30 (spicy) dill pickle slices
-About 30 toothpicks

Makes 25-30 mini meatballs

Instructions:

1) Preheat your oven to 400 degrees, and spray a pan with (olive oil) cooking spray.
2) Mix together the ground turkey, egg, bread crumbs, salt, pepper, garlic, and cheese spread in a bowl using your hands.
3) Scoop out tablespoon amounts of the mixture and form into small balls with your hands, spreading out evenly on the pan.
4) Cook the meatballs for about 15 minutes until they are fully cooked through. Remove from the oven.
5) Fold a pickle slice in half and push it to the top of the toothpick with about a finger's amount of room. Add a tomato chunk, and finish the skewer off with a turkey meatball.
6) Continue until all the meatballs are used.
7) Serve, and enjoy!

You can also serve them with the dipping sauce of your choosing, but I honesty loved them as is. Let me know what you think in the comments below!
Back to School Pipcorn Snack Mix

It's September which means it's that time of year again - back to school. Schedules are falling into place, lunches are being packed, and that back to school traffic is back in gear. So how can we beat the back to school blues? It's simple really, with this delicious Pipcorn snack mix.

Whether you're packing lunch for your kids or yourself or even just looking for a quick and easy throw together snack for an upcoming Labor Day weekend party, this mix is perfect. It has that sweet and salty combo which will have you eating by the handful. I'd honestly even eat it for dessert. 

It takes just minutes to mix together. Then all you have to do is pop it in the freezer for about an hour, and you're ready to go. It doesn't get much easier. You can even make it in a dorm room (I see you college students). So let's get started!

Here's what you'll need:

1) Two cups sea salt Pipcorn
2) 1/2 cup raw pistachio kernels, lightly chopped
3) 1/4 cup dark chocolate bing cherries, chopped (dark chocolate coated raisins work just as well)
4) 2 tbsp original Essentially Coconut coconut butter, melted

Instructions:

1) In a large bowl, combine the Pipcorn, pistachios, and dark chocolate cherries.
2) Evenly pour about half of the melted coconut butter over the top. Mix the ingredients using a spatula. Pour the rest of the coconut butter in, and mix again.
3) Cover the bowl with aluminum foil or plastic wrap and place in the freezer for about an hour until the coconut oil has solidified.
4) Using a spatula, scrape the mix off the sides of the bowl and de-clump any huge clumps of the mix. 
5) Place in a serving bowl, and enjoy!

If you aren't going to eat the mix immediately, you can store it in the fridge. If you're taking it on the go, it doesn't need to be refrigerated, as the coconut butter will stay solid as long as it isn't too hot out. If you're serving it at a party, I might suggest at least doubling the recipe because it will be gone pretty quickly, trust me!

Let me know how you use this snack mix and what you think in the comments below!