

This post is sponsored by Bolthouse Farms®, however, I am sharing my own thoughts. All opinions are my own.
I have been craving some mac and cheese like it’s nobody’s business! I know that’s a little strange since it has been nothing but hot and humid here for the past few weeks, but a girl wants what she wants and that’s some mac and cheese. So mac and cheese it was, and it was GOOD, so good in fact that I obviously had to share. Loaded with some of my favorite summer veggies, plant-based, and dairy-free, this recipe is sure to please the entire family. It’s packed with flavor and protein and is super easy and quick to whip up!
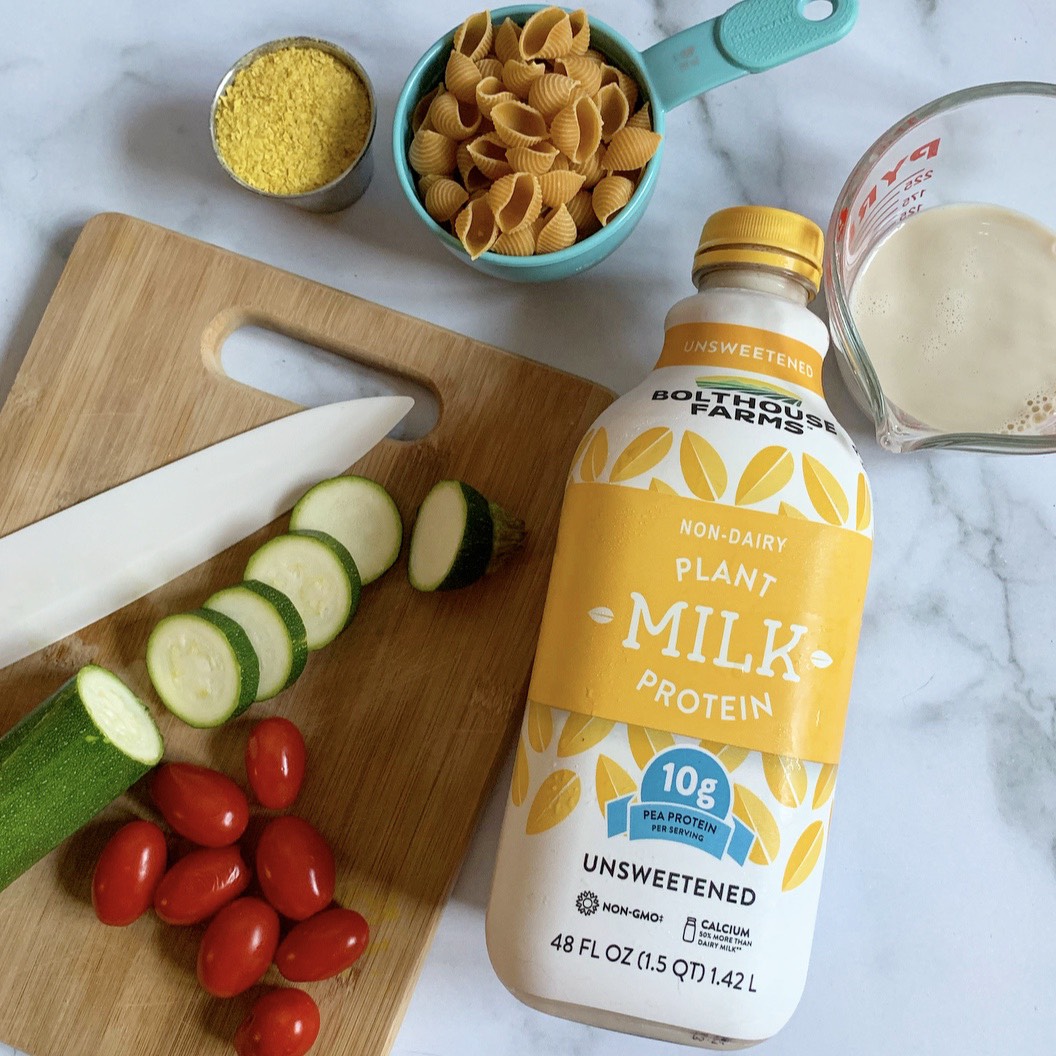
The star of this recipe is Bolthouse Farms Plant Protein Milk! Each serving contains 10 grams of pea protein and 50% more calcium than dairy milk per 8 oz. serving. It’s also non-GMO and doesn’t contain dairy, lactose, nuts, soy, carrageenan, or gluten. It comes in four variations – original, vanilla, chocolate, and unsweetened (which I used in this recipe) and can be found at your local grocer in the refrigerated area of the dairy department. Use their store locator here to find Bolthouse Farms Plant Protein milk near you!
So let’s get to it!
Here’s what you’ll need:
-7 oz pasta of your choosing (I used chickpea shells)
-1 zucchini, sliced in ¼” rounds and quartered
-Half a pint of cherry tomatoes
-1/2 cup Unsweetened Bolthouse Farms Plant Protein Milk
-1/4 cup nutritional yeast
-2 tsp Dijon mustard
-1 tsp lemon juice
-1/4 tsp sea salt
-1/4 tsp black pepper
-1/8 tsp turmeric
-1/8 tsp chili powder (optional)
-2 cloves garlic, chopped
-2 tbsp avocado oil
Instructions:
1) Toss the zucchini and cherry tomatoes with the avocado oil and season with salt and pepper as desired before baking them in a preheated 425-degree oven for 15 to 20 minutes
2) In the meantime, cook your pasta according to the instructions on the box.
3) Once cooked, strain the pasta, and use the warm pan to combine the Unsweetened Bolthouse Farms Plant Protein Milk, nutritional yeast, Dijon, garlic, lemon juice, turmeric, salt, pepper, and chili powder.
4) Pour the sauce over the pasta, and mix in the roasted veggies.
5) Serve, and enjoy!

Let me know what you think of this summery plant-based mac and cheese in the comments below and be sure to check out Bolthouse Farms full line of Plant Protein Milk!


