Dinner

Taco Turkey Burgers

Growing up I thought I hated tacos. I know, I can't even believe it myself. It's actually worse than that. I thought I hated Mexican food period. I remember being forced to eat ground beef tacos in hard shells with all of the fixings (i.e. tomatoes) that I hated as a 4 or 5 year old (P.S. I thoroughly enjoy tomatoes today). That was the first and last time I remember trying anything Mexican related for 10 years. I literally avoided Mexican food like the plague for the first 15 years of my life.

Fast forward 10 years, and I agreed to go out to dinner with a friend's family. And where did we show up to but at a dreaded Mexican restaurant. I didn't know what anything was, but I was pretty sure I hated it all. I think I just ordered whatever my friend got because that was the easy way out, and I tried to smile through a bite. I can picture 15 year old me nervously moving the fork towards my mouth. Wait, this is freaking delicious! And that was that, folks. Mind instantly changed. Mexican food is easily one of favorite cuisines today. I've literally been hooked ever since.

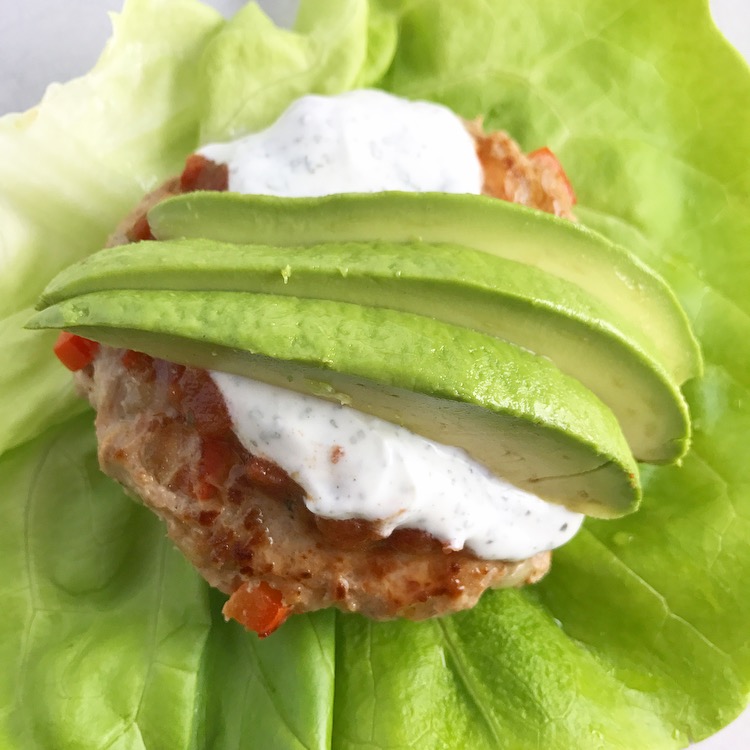
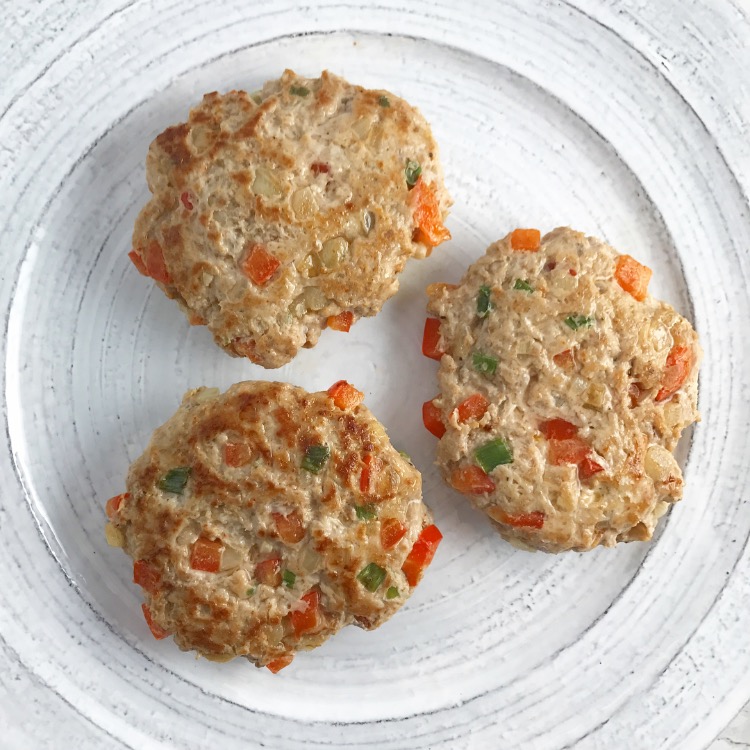
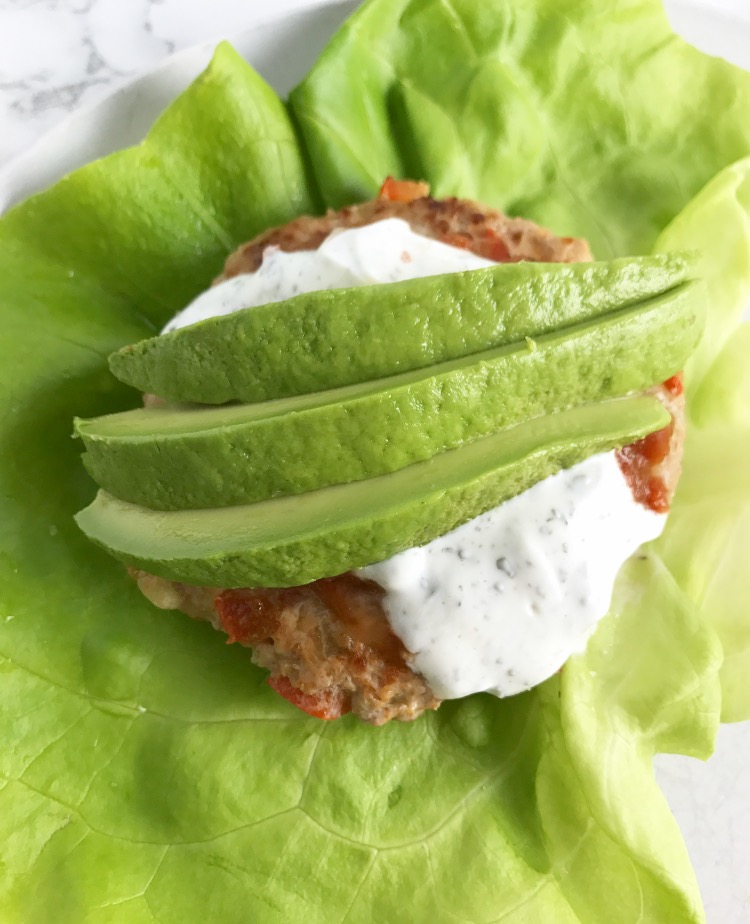
So taco Tuesday rolled around this week, and I obviously had to celebrate. I didn't have any tortillas, and I wasn't initially feeling a taco salad. So I decided to mix it up a bit and try out some taco turkey burgers, and boy were they delicious! I whipped up a cilantro lime Greek yogurt sauce and topped the burger with it and some of my other favorite goodies, and Taco Tuesday was a huge success!

Here's What You'll Need:

-1 lb ground turkey
-1/2 large white onion, chopped
-2 green onions, chopped
-1/2 bell pepper, chopped
-2 tsp Just Spices Flavors of Mexico Seasoning (the code juststacy15 will get you 15% off on their website)
-1 clove garlic, minced
-1/8 tsp sea salt
-1/8 tsp black pepper

Makes 6 burgers

Optional Cilantro Lime Greek Yogurt Sauce:
-6 oz Wallaby Plain Greek Yogurt
-1 tsp dried cilantro
-1 tsp lime juice

Instructions:

1) In a large mixing bowl, thoroughly mix together all of the burger ingredients with your hands.
2) Form the mixture into 6 balls, and flatten into burger patties.
3) On a grill or in a pan on a stove top over medium high heat, add the patties, cover, and cook for 4-5 minutes. 
4) Flip the burgers, and cook covered for an additional 4-5 minutes until cooked through.
5) Serve, top with the sauce, salsa, and/or any other fixings you like, and enjoy!

IMG_4019.JPG
IMG_4036.JPG

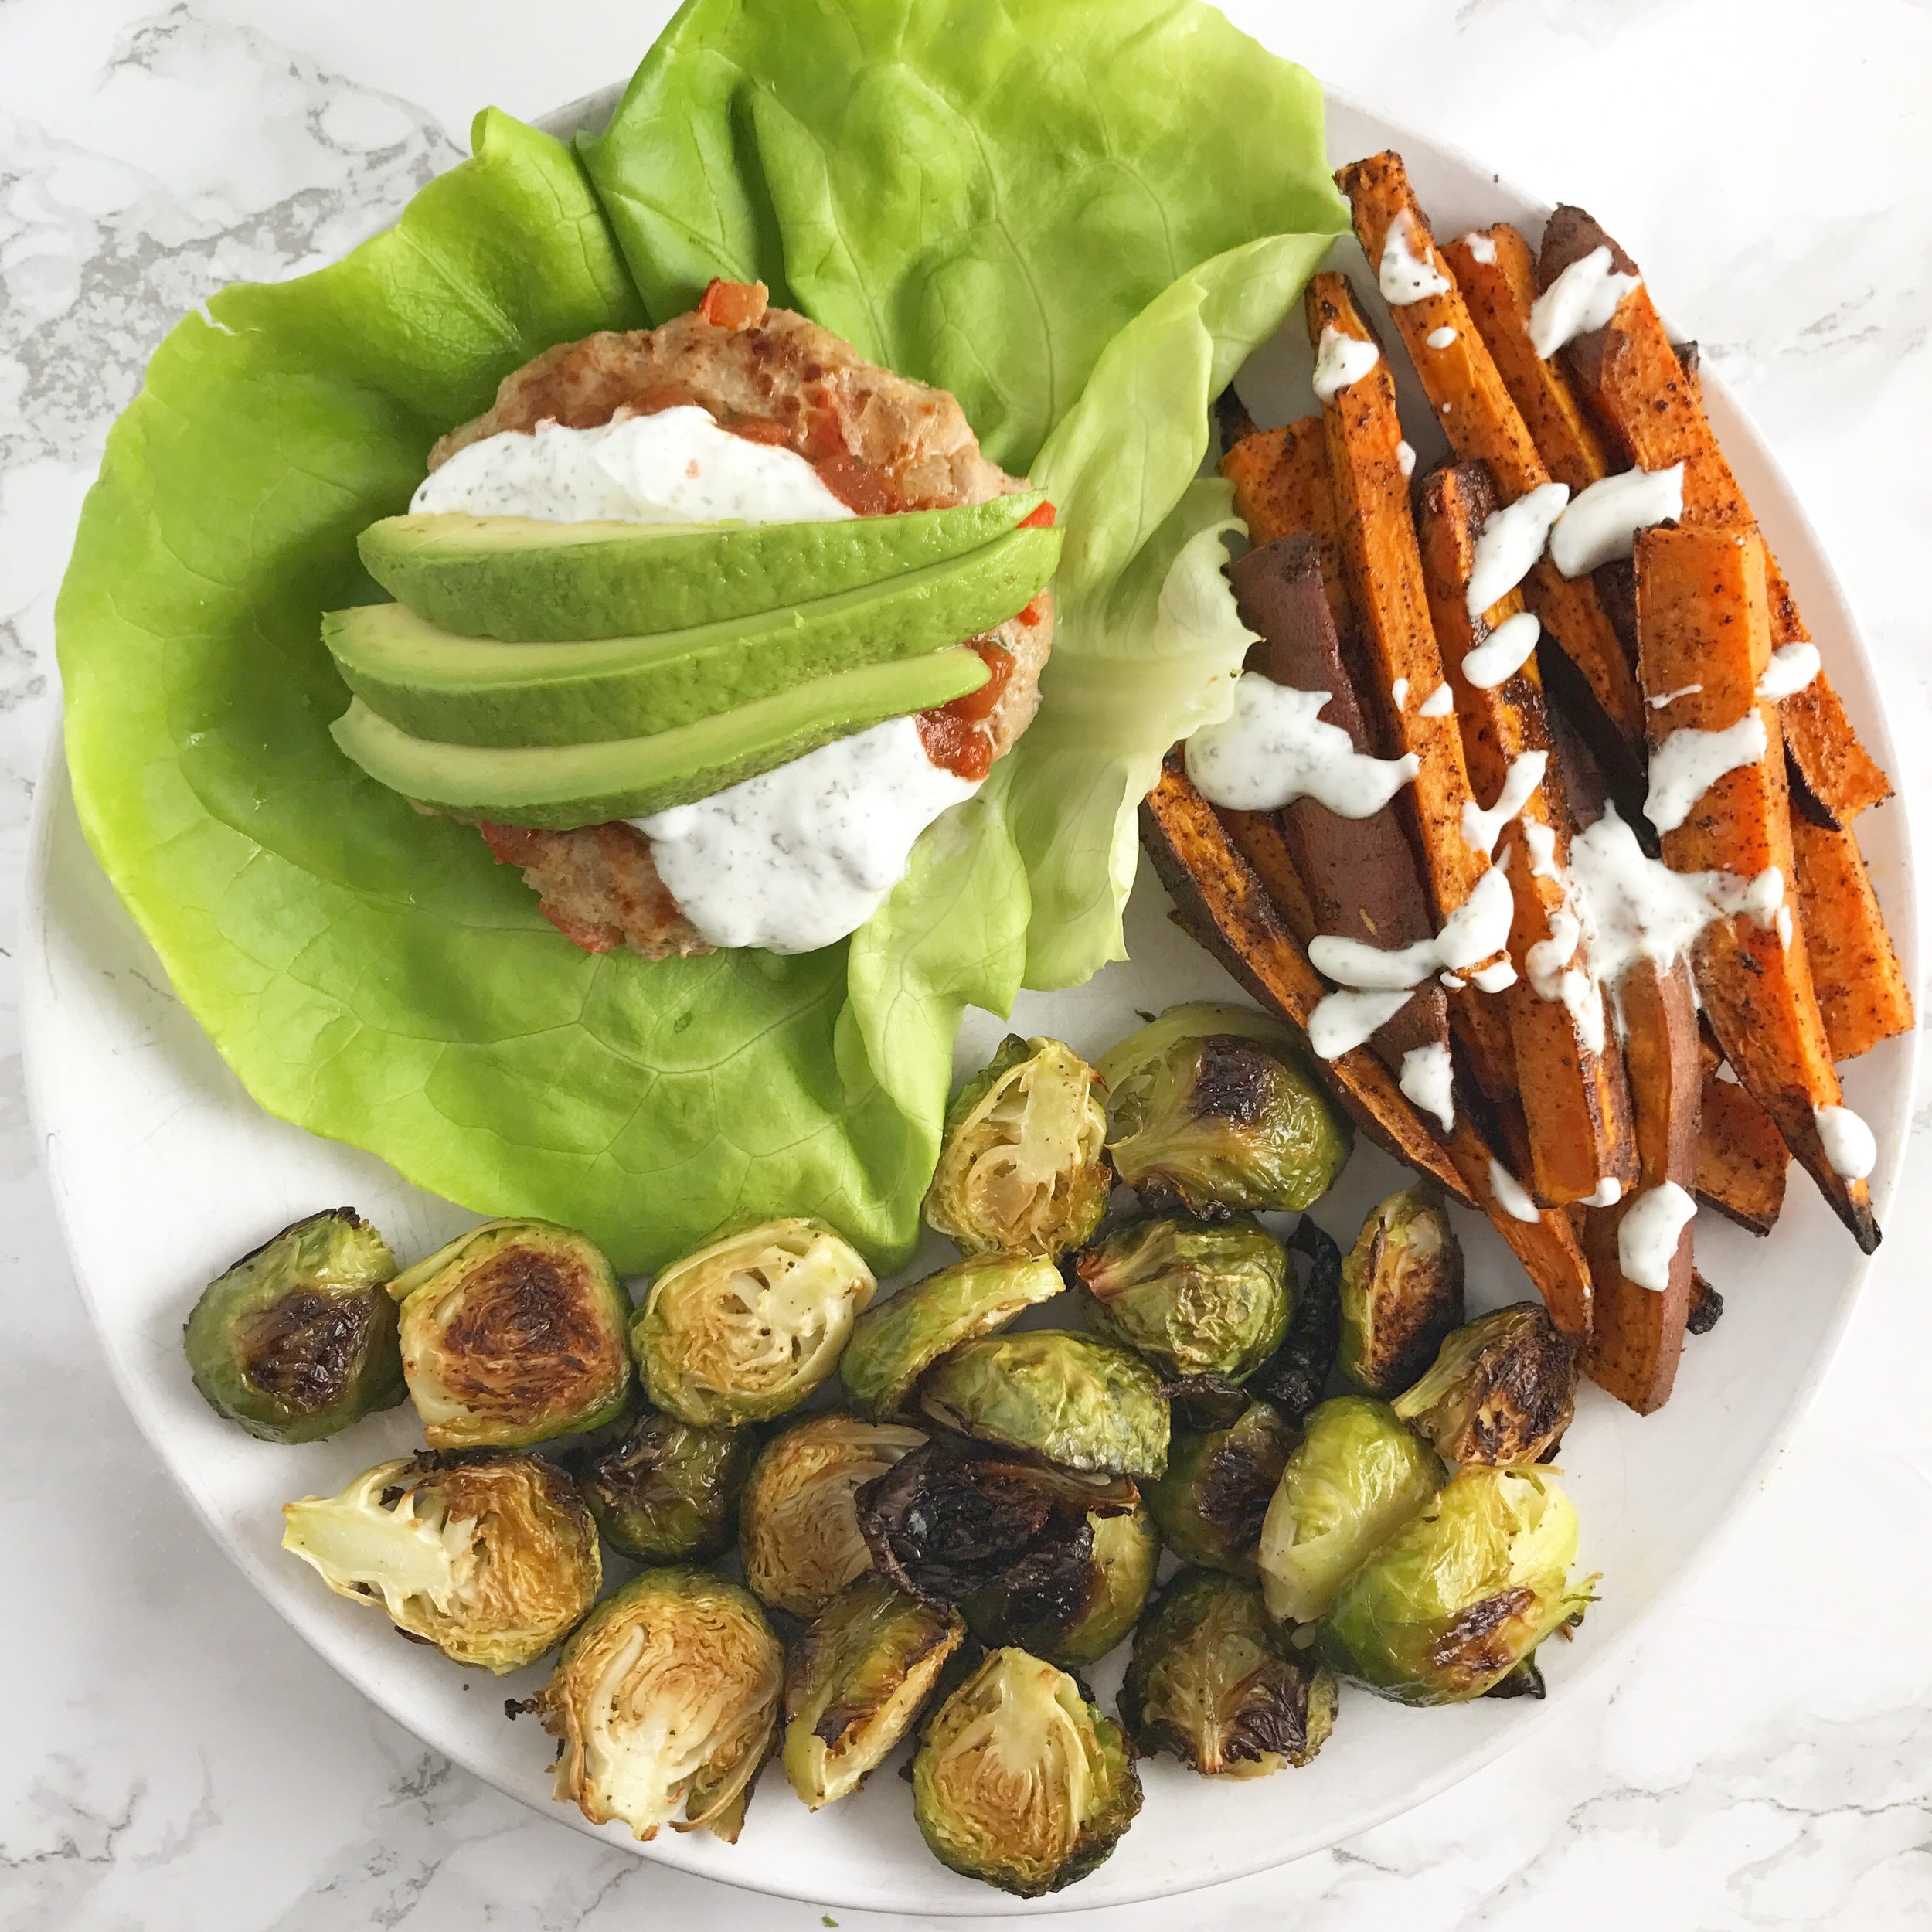
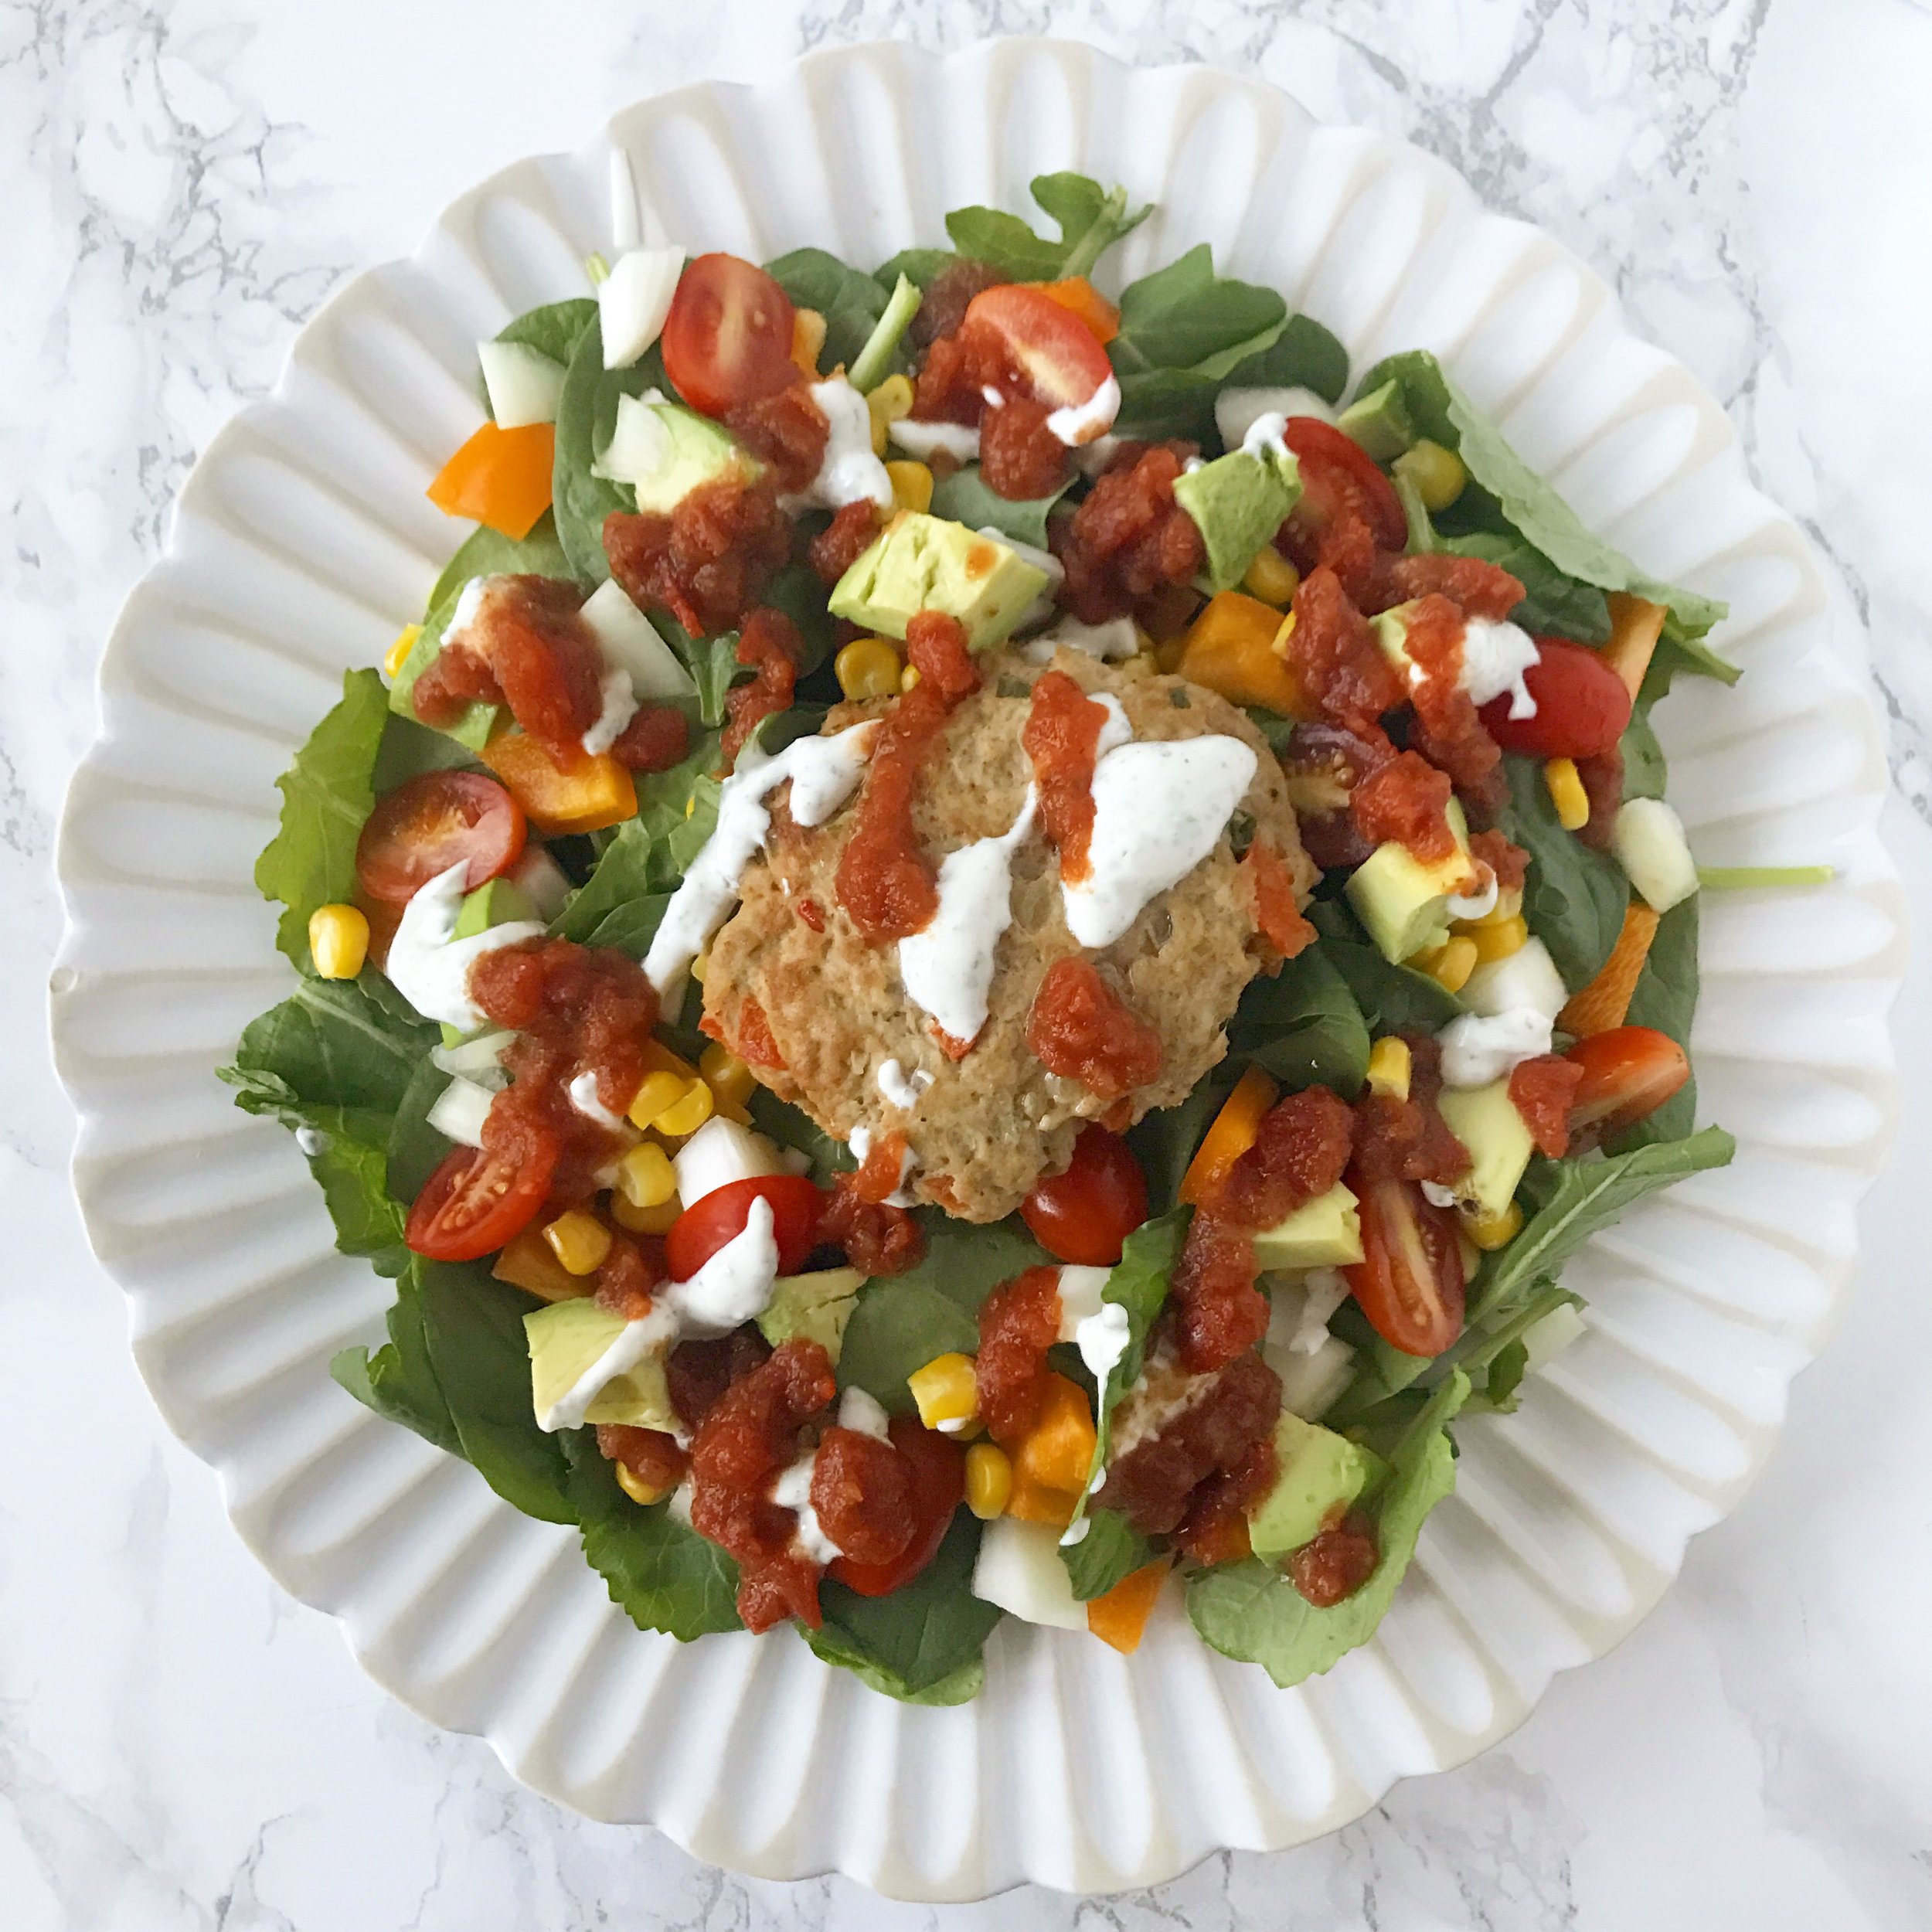
They're great on a bun, on their own, or even to top off a delicious taco salad. Let me know how you used yours and what you think in the comments below!


Cauliflower Nachos

Cauliflower has easily become one of my favorite veggies. It's delicious on its own or roasted, and it can literally be made into or the vehicle for basically anything - pizza crust, rice, buffalo "wings", you name it! It just has a naturally great flavor without being overwhelming. 

So earlier this week when I was craving nachos, I figured why not?! Sweet potato nachos are delicious, so why not swap out the chips (or sweet potatoes) for cauliflower this time. I just sliced the cauliflower into thin, chip-like pieces, seasoned them a bit, and they were the perfect base for some delicious nachos.

Here's What You'll Need:

-1 head of cauliflower, sliced into 1/4-1/2" strips (they will naturally break into "chips", and you can cut them into smaller pieces if desired)
-2 tbsp avocado oil
-1/4 tsp sea salt
-1/4 tsp black pepper
-1 tsp Just Spices Flavors of Mexico Seasoning (the code juststacy15 will get you 15% off)
-1/2 cup black beans
-1/2 large tomato, cubed
-1/4 cup red onion, chopped
-1/2 avocado, cubed
-1 jalapeno, chopped (optional)
-1/4 cup salsa
-1/2 cup shredded Mexican cheese blend

Instructions:

1) Toss the cauliflower pieces with the avocado oil, sea salt, black pepper, and Flavors of Mexico spice blend, and spread the cauliflower evenly over a baking sheet lined with parchment paper.
2) Cook in a preheated oven at 450 degree for 15-20 minutes until tender.
3) Remove from the oven, and evenly spread all of the other ingredients over the cauliflower.
4) Return the cauliflower to the oven at the same heat for an additional 5 minutes until the cheese melts.
5) Remove, serve, and enjoy!

Easy peasy, right?! And it's oh so delicious! You won't be missing those chips, trust me! I'd love to hear what you think in the comments below.

One-Pan Healthier Eggplant Parmesan

Would you believe that I've never made eggplant Parmesan? It's literally one of my favorite meals, and probably my go-to splurge meal at an Italian restaurant. So yesterday I decided that today was the day.

I had randomly bought an eggplant at Whole Foods with literally no idea or intentions for what I was going to do with it. I thought about roasting it, eggplant fries, and then it hit me (and by hit me, I mean I saw eggplant parm on Instagram). The delicious, crispy crust and ooey gooey cheesy goodness of eggplant parm was calling my name. I literally thought about it all day. Nearly 12 hours dreaming about this dish that I had never made and that could ultimately be a real F-ing disaster. But I had to give it a whirl. 

I don't know how, I guess the food gods were on my side with this one, but it was seriously BOMB. Part of me just cringed at using that word, but there's no other way to describe it. It was crispy, it was cheesy, you can still taste the eggplant, AND it's wayyyyyy better for you than the restaurant version. So let's get right on into it.

Here's What You'll Need:

-1 eggplant, sliced into 1/4-1/2" slices depending on preference (I went with about 1/2", making 10 slices)
-1/2 cup almond flour (I used this one)
-1 cup panko bread crumbs
-3 tbsp shredded parm, separated
-2 eggs, whisked
-2 tbsp olive oil, separated (into 1/2 tbsp increments)
-12 oz marinara sauce or more if desired
-1/2 cup shredded mozzarella (I used this one)
-Sea salt and black pepper

Serves 3-4

Directions:

1) Season both sides of each piece of eggplant with sea salt and black pepper.
2) Set up your dipping station (near your stove) - (a semi-large, shallow bowl of each) almond flour, 2 whisked eggs, and the panko bread crumbs mixed with 2 tbsp parmesan.
3) In a large oven-friendly pan, heat up 1/2 tbsp olive oil over medium high heat. 
4) Dip one eggplant slice at a time into the almond flour followed by the eggs followed by the bread crumb Parmesan mixture, coating all sides and edges), and place the eggplant directly into the heated pan.
5) Repeat until the pan is full, cover, and cook for about 3-5 minutes until one side is browned. Flip and cook for an additional 3-5 minutes.
6) Remove the eggplant pieces onto a cutting board or plate. Add in another 1/2 tbsp olive oil, and repeat until all of the eggplant slices are coated and cooked. This took me about 4 rotations (hence the 2 tbsp of olive oil).
7) Remove the pan from the heat, and pour in enough marinara to cover the bottom.
8) Add in a layer of the coated and cooked eggplant, topping each with a small spoonful of marinara, a sprinkle of mozzarella, and a sprinkle of the remaining parm.
9) Add in another layer of eggplant and repeat.
10) Add any remaining sauce or cheese over the top of the eggplant pieces.
11) Put the entire pan into the oven on broil for about 5-8 minutes until the cheese is melted and starts to turn a slight golden brown.
12) Remove the pan, serve, and enjoy!

IMG_3358.JPG

I served mine over some cooked garlic zucchini noodles, and it was the perfect pair. Let me know what you think in the comments below! I'd love to hear from you.

Green Chile & Aged Cheddar Turkey Meatball Skewers

Blue Moose of Boulder products have easily become some of my favorites. They make so many delicious goodies - hummus, cheese dips, salsas, and pesto, and they really are all SO good! As we're getting further into football season, it really hit me - they have the BEST game days eats! Veggies or chips with any of their dips or some pesto skewers would make for a huge hit during any entertaining you're doing this football season.

That being said, I decided I wanted to kick it up another notch and create even more options with these already delicious products. So over the next few weeks I'll be playing around with some fun football-ready recipes that are perfect to serve when you're watching the big game.

I decided to kick it off with some turkey meatballs. I thought the Green Chile & Aged Cheddar Cheese Spread would be the perfect way to pack that extra flavor into some mini meatballs. The idea was to make little appetizer-sized cheeseburger bites. I added some fresh burger toppings to the skewers, and they made for the perfect football snack!  

Here's What You'll Need:

-1 lb ground turkey
-1 egg
-1/2 cup whole wheat bread crumbs
-1/2 tsp sea salt
-1/4 tsp black pepper
-2 cloves garlic, pressed or minced
-3 tbsp Blue Moose of Boulder Green Chile & Aged Cheddar Cheese Spread
-2 large tomatoes, chopped
-About 30 (spicy) dill pickle slices
-About 30 toothpicks

Makes 25-30 mini meatballs

Instructions:

1) Preheat your oven to 400 degrees, and spray a pan with (olive oil) cooking spray.
2) Mix together the ground turkey, egg, bread crumbs, salt, pepper, garlic, and cheese spread in a bowl using your hands.
3) Scoop out tablespoon amounts of the mixture and form into small balls with your hands, spreading out evenly on the pan.
4) Cook the meatballs for about 15 minutes until they are fully cooked through. Remove from the oven.
5) Fold a pickle slice in half and push it to the top of the toothpick with about a finger's amount of room. Add a tomato chunk, and finish the skewer off with a turkey meatball.
6) Continue until all the meatballs are used.
7) Serve, and enjoy!

You can also serve them with the dipping sauce of your choosing, but I honesty loved them as is. Let me know what you think in the comments below!

Five Ingredient Tuna Cakes (GF)

So if you haven't already seen me talk about Safe Catch tuna on Instagram, let me give you a little introduction. They sell pretty much the only canned tuna I will ever buy again. They have the lowest mercury limit of any tuna brand (their elite tuna is 10x stricter than FDA regulations), making it safe for both pregnant women and children to eat regularly. They test every single tuna and pack each can with just the tuna and it's natural juices. Does it get any better than that? It actually does because you can use the code allroads for 10% off your order on their website!

I've loved playing around with this tuna in the kitchen ever since discovering it, and I can't wait to bring you guys some delicious recipes here on the blog. To start it all off I made these super easy, super delicious tuna cakes. They're perfect for an easy dinner, and the leftover are great to pack for lunch.

Here's What You'll Need:

1) 5 oz Safe Catch Elite Tuna
2) 1/2 cup cooked Chosen Foods quinoa
3) 1/4 cup onion, chopped
4) 1 tbsp German mustard
5) 1 egg

Instructions:

1) In a bowl, mix together the ingredients with your hands.
2) Form the mixture into 2-3 patties (depending on size), squeezing tightly to rid of excess liquid.
3) In a pan on the stove top over medium high heat, add the patties and cook for 3-4 minutes per side. If the patty crumbles a bit when flipping, just reassemble it using a spatula. 
4) Remove from heat, serve, and enjoy!

I served mine over a couple of tomato slices. They'd also be great on their own or on top of a salad. You can add some extra mustard or hot sauce for a little kick. Let me know how you ate yours and what you think in the comments below!